Blog
Entries

Home /Blog/ Service Connection / Setting Up an ARM Service Connection : manual implementation

Setting Up an ARM Service Connection for Azure DevOps with Workload Identity Federation : manual implemetation


Posted 01 January 2024
By Ramy RZEM 8 min read

Implementation manual Workload Identity Federation 🔐

Choosing this feature is recommended if you do not have enough permissions on Azure to manage app registration.
You can have a look on my previous post if you are interested in automatic implementation of service connection.

Prerequisites

Before you start, ensure you have the following:

  • An Azure subscription and Azure Entra Id permissions.
  • An Azure DevOps organization.
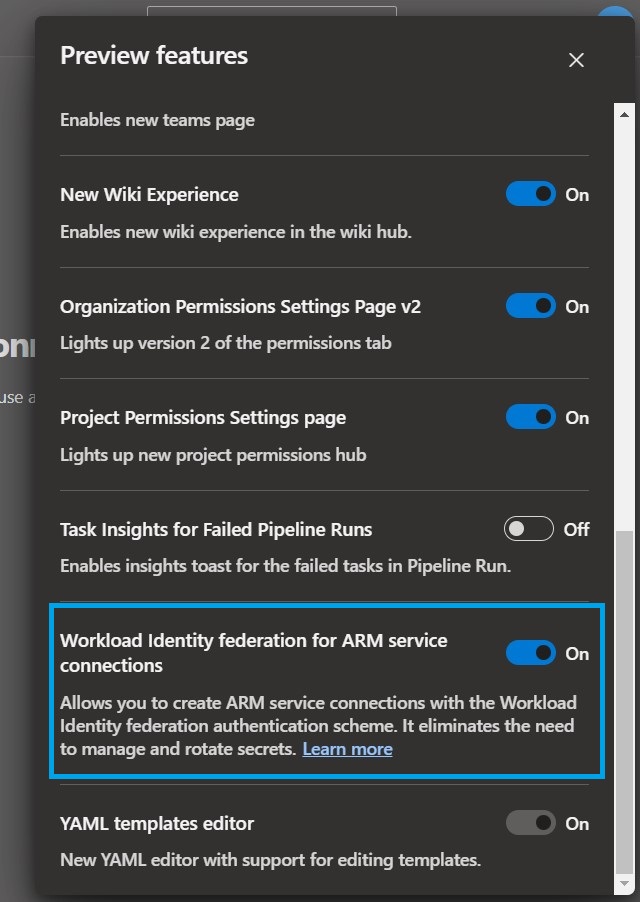
  • Federation feature activated on Azure DevOps organization.
  • The necessary permissions to create service connections in Azure DevOps.
  • An Azure subscription access with the required permissions to configure identity federation.
First of all you need to have a check on you Azure DevOps organisation, to see if the Federation feature is well activated on usersetting/ preview feature on organisation level. new service-connection

New service connection

new service-connection

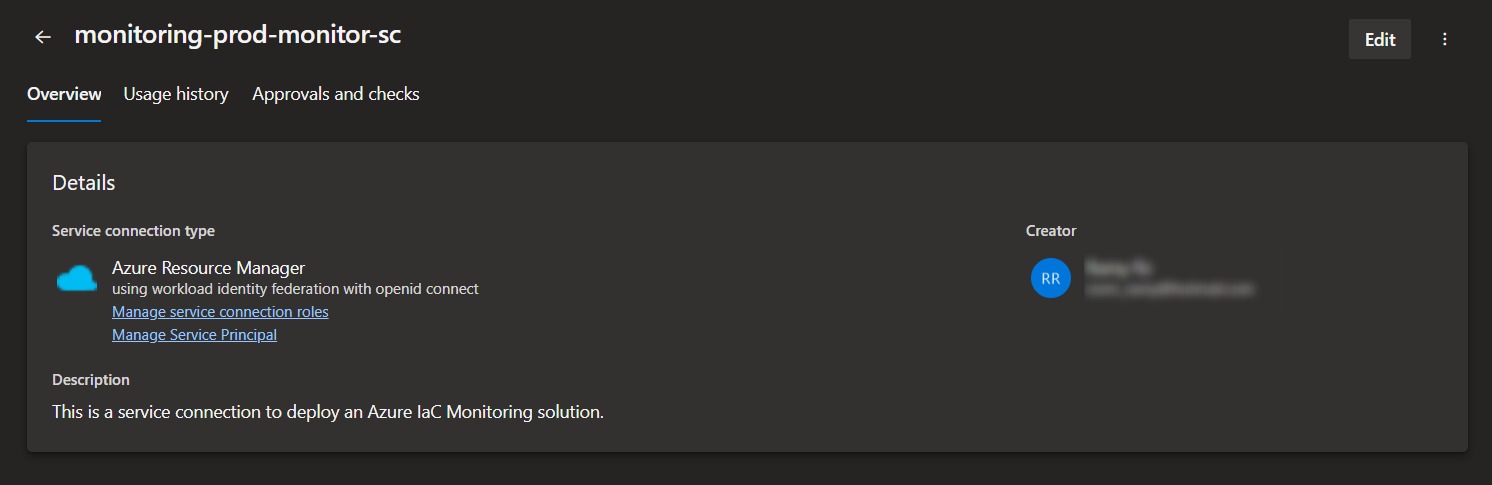
First thing is to go through Azure DevOps organisation/project/service connections/ Create service connection (manual). Then select the manual Workload Identity federation

Fill the needed inforamtion

STEP 1 : BASICS To do so, we will need to handle too parts, Azure DevOps and Azure. We will suppose you don't have access to Azure and you asked to create the service principale and Federation for you to be used on Azure DevOps. new service-connection
  • Service Connection Name: You can put the name of you service-connection, depends on your name convention, it could have this kind of pattern : ProjetName-Environnement-TypeService-SC
  • Description: It's optional bu setting a description good for better visiblity which describe what the service connection is about on the quick review.
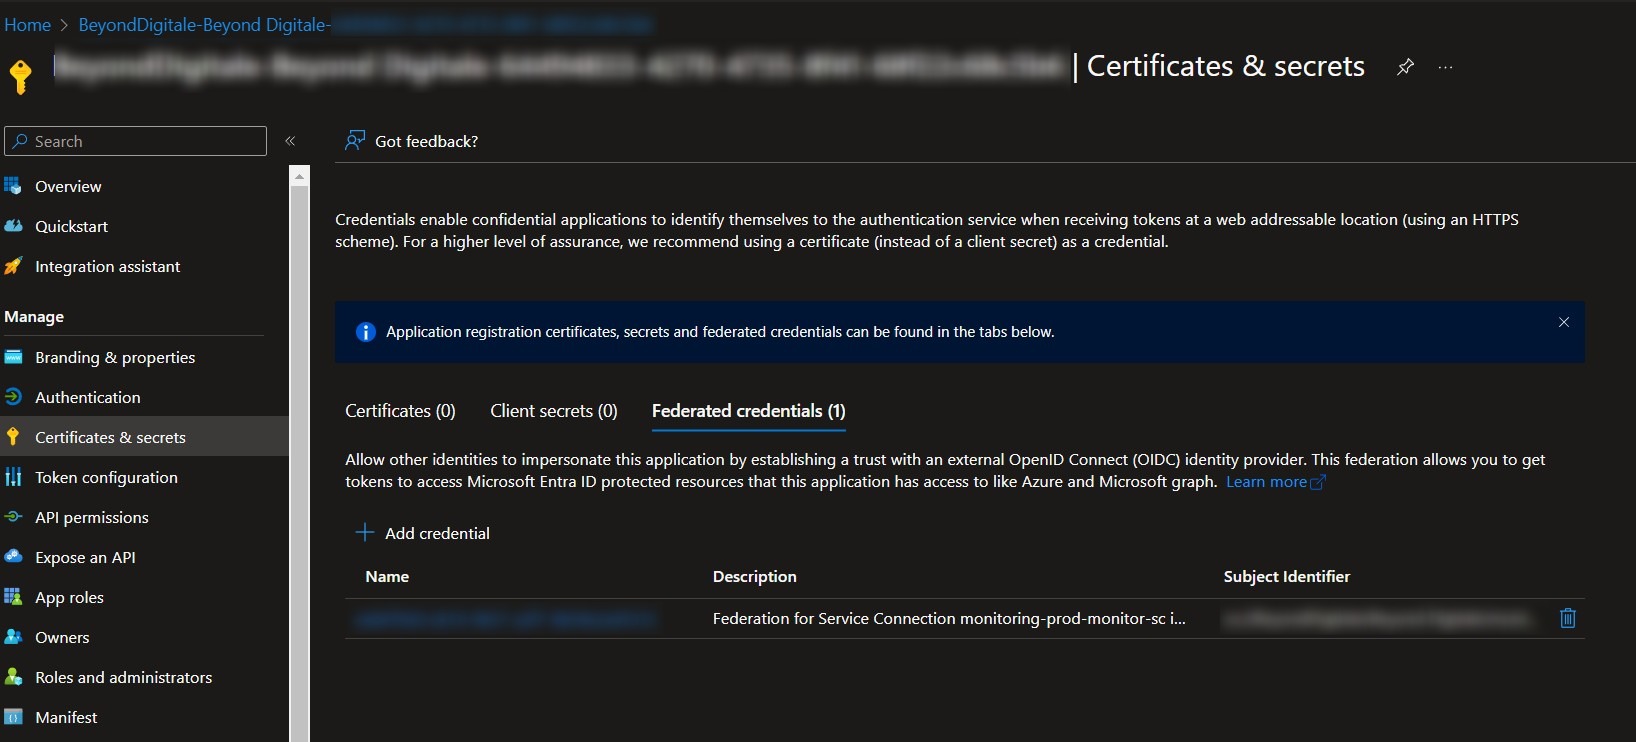
STEP 2 : Service Principal Details new service-connection
  • Scope level: It depends on your needs of use, you can select Machine Learning Workspace or Management Group or extend to subscription level if needed.
  • App registration and federated credentials creation

    Now we have those 2 informations from Azure DevOps service connection Issuer and Subject identifier, we can create our app registration and federation credentials and we will need to use them up there. Inside Azure Entra ID/ App registrations/ New registration You register the application, you can set the name depending on your convention name of your organisation, I will go for : platform-scope-appNAme-env Once App registration created, you can grant permission needed to it. Go to the wanted resource for example resource groupe and select the Acess Control (IAM), then attirube a role for example reader or contributor of the resource. Once the app registration created and role is granted, you can go to the Certificates & secrets part and select Federated credentials tab, then Add credential. new service-connection Select other Issuer.
    Here you will need the Azure DevOps inforamtion of issuer, copy and paste ! Using those information Microsoft Entra ID will be able to validate the connection. new service-connection new service-connection Then, enter the credential name and some description to have quick comprehension of the credential and hit Add button. Finally you get back to Azure DevOps Side to fill last inforamtion needed. new service-connection Service Principal Id (App/ client ID) and Tenant/ Directory ID which you get them from your App registration overview. new service-connection And hit verify and save. new service-connection

    Conclusion:

    In conclusion, use the federation manual with Azure DevOps is recommended, when there is lack of permission otherwise you can do the same automatically as explained on the previsous article. Anyway Federation impove workflows and garantie security and effecience of projects.
    official Microsoft documentation.